Showing posts with label Ina Garten. Show all posts

6.26.2012

The Perfect 4th of July Dessert: A Flag Cake!

Happy (almost) 4th of July! Not only is it time to celebrate our country's birthday, if you live in Los Angeles it's also time to celebrate the end of June gloom and the beginning of perfect summer weather. This weekend, that means a plethora of BBQs, picnics and pool parties. For guests of those BBQs and pool parties, it also means figuring out what to bring! If you're at a loss over what [insert dish here] to make as your BBQ contribution, worry no more! I've got an absolutely fantastic dessert that will put your patriotism – and baking skills – on full display.

The perfect 4th of July party dessert!
It's a flag cake. Yes, a flag cake. All you need to do is make a cake, make some icing and garnish with blueberries and raspberries until it looks like the American flag. Okay, maybe it's not really that simple – it's a bit time-consuming and some basic piping skills are required – but it's SO worth it, especially for this red, white and blue holiday. While I made the cake and the frosting from scratch, you can absolutely use boxed cake mix and tubs of buttercream or cream cheese icing. The recipe I'm following is from the Barefoot Contessa herself: Ina Garten. It can be found in her Barefoot Contessa Family Style cookbook and it's my #1 go-to Fourth of July dessert recipe. Hopefully it will be yours, too!

Ingredients
For the cake:
  • 18 tablespoons (2 1/4 sticks) unsalted butter at room temperature
  • 3 cups sugar
  • 6 extra-large eggs at room temperature
  • 1 cup sour cream at room temperature
  • 1 1/2 teaspoons pure vanilla extract
  • 3 cups flour
  • 1/3 cup cornstarch
  • 1 teaspoon kosher salt
  • 1 teaspoon baking soda
For the icing:
  • 1 pound (4 sticks) unsalted butter at room temperature
  • 1 1/2 pounds cream cheese at room temperature
  • 1 pound confectioners' sugar, sifted
  • 1 1/2 teaspoons pure vanilla extract
For the "flag" decorations:
  • 2 half-pints blueberries
  • 3 half-pints raspberries
To make the cake: Heat the oven to 350 degrees F. Butter and flour an 18 x 13 x 1 1/2-inch sheet pan. Cream the butter and sugar in the bowl of an electric mixer fitted with the paddle attachment on high speed, until light and fluffy. On medium speed, add the eggs, 2 at a time, then add the sour cream and vanilla. Scrape down the sides and stir until smooth.

Butter and flour an 18 x 13 x 1 1/2-inch sheet pan

Cream butter and sugar


Add eggs, one at a time
Add vanilla and sour cream and mix to combine
This is what the wet ingredient batter should look like
Sift together the flour, cornstarch, salt, and baking soda in a bowl. With the mixer on low speed, add the flour mixture to the butter mixture until just combined. Pour into the prepared pan. Smooth the top with a spatula. Bake in the center of the oven for 20 to 30 minutes, until a toothpick comes out clean. Cool to room temperature.

Sift together flour, cornstarch, salt, and baking soda
With mixer on low, add dry ingredients slowly to wet ingredients. The batter should look like this when all the dry ingredients are incorporated.
Spread the batter evenly on the baking sheet

Bake for 25-30 minutes or until a toothpick comes out clean.
Make the icing: Combine the butter, cream cheese, sugar, and vanilla in the bowl of an electric mixer fitted with the paddle attachment, mixing just until smooth.

Combine icing ingredients and mix until smooth

Decorate the cake: I keep the cake in the baking sheet and serve it that way. It's much easier for me. If you want to flip the cake out, line the baking sheet with parchment paper and flip it onto a large platter after it has baked and cooled. Then spread three-fourths of the icing on the top of the cooled sheet cake. Outline the flag on the top of the cake with a toothpick. Fill the upper left corner with blueberries. Place 2 rows of raspberries across the top of the cake like a red stripe. Put the remaining icing in a pastry bag fitted with a star tip and pipe two rows of white stripes below the raspberries. Alternate rows of raspberries and icing until the flag is completed. Pipe stars on top of the blueberries.

Spread 3/4 of icing onto cake. Outline flag with a toothpick.
Wash and dry blueberries
Line rows of blueberries for the "star" area of the flag.
Fill the entire "star" area with blueberries.
VERY GENTLY, clean and dry the raspberries.
Starting at top of cake, make two rows of raspberries.
Using a large star tip in a piping bag, pipe two rows of icing below raspberries.
Alternate rows of raspberries and icing until flag is complete (you can already see the flag taking shape!).

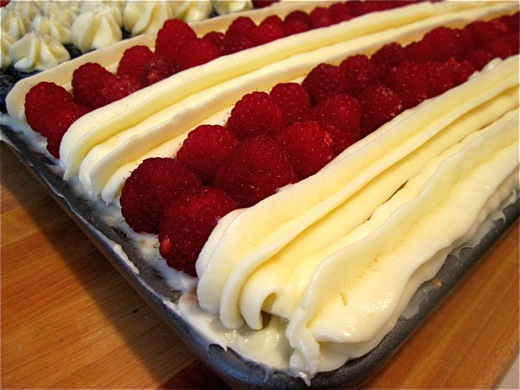
Here's the detail of the raspberry and icing rows.
Pipe stars onto the blueberry layer.

You're done! You've got a 4th of July flag cake! Chill it in the fridge for a bit before taking it to your party.


6.22.2010

Conquering a Cooking Phobia: Scallops Provençal

This week is about conquering my cooking fears. Obviously I love to cook and hopefully am somewhat good at it, or else I wouldn't be writing this blog. But there are just some things that I feel are better ordered at restaurants, because my perception of their complicated, involved, lengthy preparations have me backed into my figurative kitchen corner. Take scallops for example. I don't mean tiny, fishy bay scallops. I mean gigantic, tender, gorgeous sea scallops. The ones you get at a restaurant like Gulfstream or Napa Valley's FARM, for example, where they're just perfect. So perfect you know anything you do at home will just be a disappointment. They've been pan seared and have a light, golden crust, a perfectly succulent texture and taste like heaven. I love when they come with roasted golden beets (another foodie phobia of mine), marcona almonds and frisee.

Conquering a cooking phobia: Pan-Seared Scallops Provençal
Photo courtesy of OnePerfectBite

So the other day I decided to tackle the shellfish head (or shell) on, spreading out my cookbooks and searching each index for the perfect scallop recipe. I was picky; after all, I figured the better the recipe, the better my chances of success. I found what seemed to be a great recipe from Ina Garten for Scallops Provençal, and while I had low expectations (yet high hopes), I have to say it turned out great!

I was so excited about the result that I actually bought scallops again for tonight. Now I'm going to try, try and try again until I get close to perfect. Most importantly, I'm one kitchen phobia down and only have a few more to go. Here's the recipe:

Scallops Provençal
  • 1 pound fresh sea scallops
  • Kosher salt and freshly ground black pepper
  • All-purpose flour, for dredging
  • 4 tablespoons (1/2 stick) unsalted butter, divided
  • 1/2 cup chopped shallots (2 large)
  • 1 garlic clove, minced
  • 1/4 cup chopped fresh flat-leaf parsley leaves
  • 1/3 cup dry white wine (make sure it's good...then drink the rest!)
  • 1 lemon, cut in 1/2
A word to the wise: This recipe goes by FAST. Even one extra minute means tough scallops; and no one wants tough, chewy scallops. So make sure you've got everything ready chopped, measured and ready to go before you start.

Sprinkle scallops with salt and pepper, toss with flour, and shake off the excess. In a very large saute pan, heat 2 tablespoons of the butter over high heat until sizzling and add the scallops in 1 layer. Lower the heat to medium and allow the scallops to brown lightly on 1 side without moving them, then turn and brown lightly on the other side. This should take 3 to 4 minutes, total. Melt the rest of the butter in the pan with the scallops, then add the shallots, garlic, and parsley and saute for 2 more minutes, tossing the seasonings with the scallops. Add the wine, cook for 1 minute, and taste for seasoning. Serve hot with a squeeze of lemon juice.

Dredge scallops in flour with salt & pepper, then brown in pan

Dice two large shallots & garlic clove

Wash and chop flat leaf parsley

Flip scallops once they are golden brown

Add shallot, garlic, flat leaf parsley and cook for two minutes. Then add the white wine and let all the flavors come together.

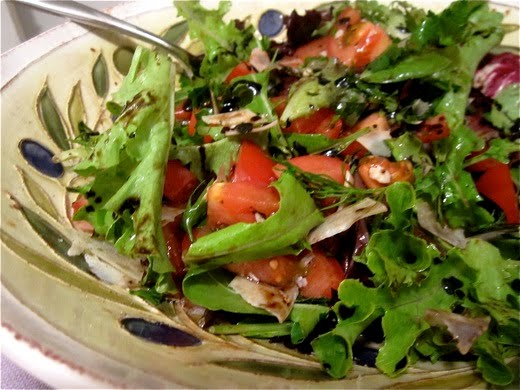
I tossed a mixed green, tomato and mozzarella salad on the side.

There you have it! Scallops Provençal

6.18.2010

"Eat My Blog" Charity Bakesale! Saturday, June 19 @ Tender Greens, WeHo

It's time to blow your no-carb diet for a good cause. The Eat My Blog food blogger bake sale is tomorrow – Saturday, June 19 – at Tender Greens in West Hollywood. I spent most of today baking for the event, making coconut cupcakes with cream cheese & coconut icing, vanilla & almond cupcakes, and finally, triple fudge walnut brownies. To say that my house smelled like chocolate and vanilla and coconut heaven is an understatement.

While *I* won't be at the bake sale tomorrow because I'll be celebrating my friend's bridal shower – no worries, I dropped off the goods earlier tonight – my cupcakes and brownies WILL be there. Here's my experience during my own personal Friday bake-off. If you do hit Tender Greens, check out my treats. They're made from scratch and all go to a good cause! Recipes can be found below.

Little Charlie was on cupcake and brownie duty all day :)

My vanilla & almond cupcakes, hot out of the oven.

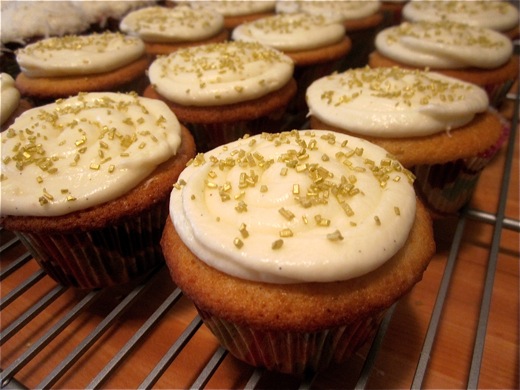
I piped homemade cream cheese icing in circular patterns. Wanted to keep it simple.

But then I added some edible gold sugar. Bling!

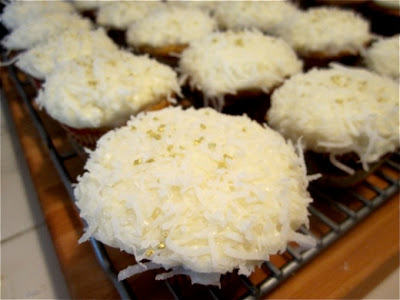
Here are absolutely delicious coconut cupcakes...one of my favorite recipes (see below).

I couldn't resist adding some gold sparkles to the coconut either! What can I say...sparkles make everything better.

I crafted "Pardon My Crumbs" signs

Not to mention display signs for each of my sweet treats...

Here are the cupcakes...all ready to go!
Now for the coconut cupcake recipe (don't forget the brownies; recipe is below). To modify the coconut cupcakes and make them vanilla & almond cupcakes, simply omit the coconut from both the cupcakes and the frosting. Done and done!

Coconut Cupcakes
  • 3/4 pound (3 sticks) unsalted butter, room temperature
  • 2 cups sugar
  • 5 extra-large eggs at room temperature
  • 1 1/2 teaspoons pure vanilla extract
  • 1 1/2 teaspoons pure almond extract
  • 3 cups flour
  • 1 teaspoon baking powder
  • 1/2 teaspoon baking soda
  • 1/2 teaspoon kosher salt
  • 1 cup buttermilk
  • 14 ounces sweetened, shredded coconut
For the frosting:
  • 1 pound cream cheese at room temperature
  • 3/4 pound (3 sticks) unsalted butter, room temperature
  • 1 teaspoon pure vanilla extract
  • 1/2 teaspoon pure almond extract
  • 1 1/2 pounds confectioners' sugar, sifted
Preheat the oven to 325 degrees. In the bowl of an electric mixer fitted with the paddle attachment, cream the butter and sugar on high speed until light and fluffy, about 5 minutes. With the mixer on low speed, add the eggs, 1 at a time, scraping down the bowl after each addition. Add the vanilla and almond extracts and mix well.

In a separate bowl, sift together the flour, baking powder, baking soda, and salt. In 3 parts, alternately add the dry ingredients and the buttermilk to the batter, beginning and ending with the dry. Mix until just combined. Fold in 7 ounces of coconut.

Line a muffin pan with paper liners. Fill each liner to the top with batter. Bake for 25 to 35 minutes, until the tops are brown and a toothpick comes out clean. Allow to cool in the pan for 15 minutes. Remove to a baking rack and cool completely.

Meanwhile, make the frosting. In the bowl of an electric mixer fitted with the paddle attachment, on low speed, cream together the cream cheese, butter, and vanilla and almond extracts. Add the confectioners' sugar and mix until smooth. Frost the cupcakes and sprinkle with the remaining coconut.

Triple Fudge & Walnut Brownies
Now...I simply can't forget the brownies...this is one of THE best brownie recipes ever. Hands down.


Close up of the brownies...

All packed and ready to go!
Here is the brownie recipe. Courtesy of Ina Garten with my own touches added to it. These will knock your friend's and family's socks off.

Ingredients:
  • 1 pound unsalted butter
  • 1 pound plus 12 ounces semisweet chocolate chipse
  • 6 extra-large eggs
  • 1/3 cup espresso coffee
  • 2 tablespoons pure vanilla extract
  • 2 1/4 cups sugar
  • 1 1/4 cups all-purpose flour
  • 1 tablespoon baking powder
  • 1 1/2 teaspoons salt
  • 3 cups chopped walnuts
Preheat oven to 350 degrees F. Butter and flour a 12 x 18 x 1-inch baking sheet. Melt together the butter, 1 pound of chocolate chips, and the unsweetened chocolate in a medium bowl over simmering water. Allow to cool slightly. In a large bowl, stir (do not beat) together the eggs, coffee granules, vanilla, and sugar. Stir the warm chocolate mixture into the egg mixture and allow to cool to room temperature.

In a medium bowl, sift together 1 cup of flour, the baking powder, and salt. Add to the cooled chocolate mixture. Toss the walnuts and 12 ounces of chocolate chips in a medium bowl with 1/4 cup of flour, then add them to the chocolate batter. Pour into the baking sheet.

Bake for 20 minutes, then rap the baking sheet against the oven shelf to force the air to escape from between the pan and the brownie dough. Bake for about 15 minutes, until a toothpick comes out clean. Do not overbake! Allow to cool thoroughly, refrigerate, and cut into 20 large squares.


Related Posts with Thumbnails